THE BLOW-YOUR-MIND BLOW-DRY
Featuring Global Brand Storyteller, Olivia Smalley
Expert hairdressers know exactly how to zip through a profesh blow-dry as fast as possible – it’s a must when you have back-to-back clients. And Olivia Smalley, Joico Global Brand Storyteller (who has tons of her own long, blonde hair to contend with), is no exception. Today, she’s sharing her favorite blow-dry hacks — complete with a product that cuts drying time IN HALF. Check it out:
Blow-dry like a pro…
Step 1: The big squeeze
Start by removing excess water from your hair. It’s ok to gently squeeze the ends of hair, but never twist or pull them, cautions Olivia. If you have time, allow your hair to air-dry slightly, or simply use a super-absorbent microfiber towel that acts like a sponge and helps avoid vigorous rubbing of the hair cuticle.
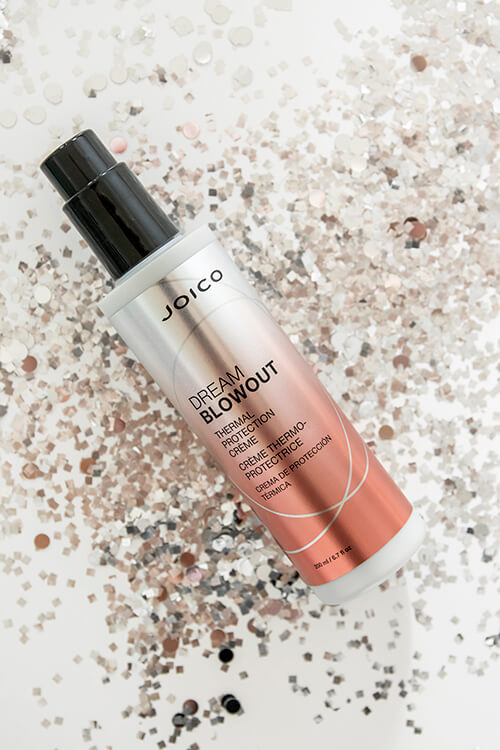
Step 2: Apply your dream cream
Joico’s Dream Blowout Protection Crème is Olivia’s favorite way to safeguard strands against the ravaging effects of thermal styling, humidity, frizz, and even damage caused by pollution…for a full 24 hours. Elevating the daily drying drudge into something extraordinarily fast and easy, Dream Blowout’s super-hydrating, multi-tasking ingredients – including Manketti Nut and Safflower Seed Oils — transform each section of hair as it’s being styled; delivering full, shiny, smooth, luxe locks in minutes.
Step 3: Begin “rough-drying” your hair
That’s actually just industry-speak for blowing out your hair on medium heat without a brush, until strands are 70 percent dry. The bennie here is that you’re not insanely tugging on strands when they’re soaking wet and susceptible to breakage.

Step 4: Start sectioning. (And don’t skip this.)
“It’s super important to create sections to avoid over-drying or burning your hair,” says Olivia. Quick science lesson: If you don’t section hair into small, manageable bits, you’ll end up grabbing overly large sections of hair with your brush. And that means that when you try to dry all those underneath strands (which takes forever), you’ll end up exposing hair to overly long, directed bursts of high heat.
Step 5: Follow this map
Begin drying your hair from the bottom up, working your way towards the top of your head, explains Olivia, who says it’s way easier not to struggle with all that damp hair below.
Step 6: Concentrate!
No, we don’t mean focus. We mean put that plastic gizmo on the end of your blow-dryer – the one that came in the box and you’re never quite sure what it does. The narrow opening is actually designed to keep a safe distance between the heat of the dryer and your hair; it also directs airflow, so you get a sleeker, shinier blow-dry.
Step 7: Go big or go home
The bigger the brush, the more time saved. Olivia likes to whip out her large paddle brush; but any brush with a larger surface – even a round one – will help shave off time, since you’re grabbing hair more effectively.
Step 8: Use a vented brush if you’re getting antsy
Those open-hole models will help shorten blow-dry time by maximizing airflow.
Step 9: Get to the root of the matter
Always make sure your roots are fully dry, or you risk creating a frizz sitch.
Step 10: Now, cool it!
Once you’ve finished styling, turn your blow dryer to the cool setting and go over your hair again. “This last step will help seal the cuticle and really bring out the shine,” says Olivia.
Watch her demo the perfect, speedy blowout here….
View this post on Instagram